

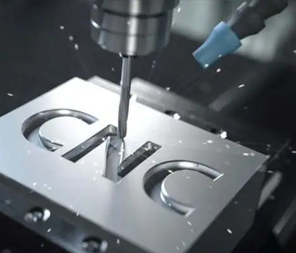


Combining your part threads can sometimes be the ultimate destruction of your component. There are a lot of design rules and the precision required to manufacture threads is very high. On top of that, these features require some extra thought and care to make sure they work as designed. Get them right and the assembly can last for years. Do it wrong and you enter a world of hurt.
Adding threads to a part can sometimes lead to the eventual destruction of the part, and the precision required to make threads is very high. On top of that, these features require some extra thought and attention to make sure they work as designed.
Male vs. Female Threads
An easy way to remember this distinction is that external threads, which can be found on screws and bolts, are located on the outside of the hardware. Internal threads are located inside the body part. They accept and lock the screw and bolt threads. You will find more detailed information about external and internal threads in later sections of this design tip.
(This chart shows three different types of holes that can occur in a turned part.)
Bolt Pitch
When we talk about threads on bolts and screws, it is not a one-size-fits-all situation. In addition to metric threads, there are three main types of inch threads that are part of the Unified Thread Collection.
UNC (coarse pitch): 20 threads per inch (tpi)
UNF (fine pitch): 28 tpi
UNEF (extra fine pitch): 32 tpi
Please note that adding UNEF pitch requires our precision machining services, which can be accessed through our quoting system. For example, if you want to use #4-40 screws, you know that #4 screws have a thread diameter of 0.11 inches (2.794 mm) and 40 threads per inch, meaning a very fine pitch.
For turned parts, there are three types of holes that can be used to accommodate female threads:
1. on-axis: a hole from one end directly through the center of the turned part
2. axial: a hole that starts at one end of the part but does not go all the way through the center
3. radial: hole through the outer arc of the turned part
Internal Threads
Internal threads are machined using a single-lip threading tool rather than a conventional thread tap. When machining a female threaded hole, the hole may be longer than our threading tools can reach. In this case, you have several options depending on your needs:
(From left to right, images 1, 2, and 3 depict three ways to approach the maximum thread depth.)
For long through holes that exceed the maximum range, select the hole from the side where you expect to start the screw (see Image 1 in the three panel illustrations above). If your screw needs to go all the way through the part, you will also have to complete it by passing a tap through the hole (in the second procedure).
It is also possible to select both sides of the feature to be threaded (see Figure 2 in the illustration above), but note the maximum thread depth as they overlap each other in the hole. This raises concerns about tapping features from both sides as there is a risk of cross-tapping and the screw may not go all the way through the part. As long as the threads do not intersect (see Figure 3), it is usually OK to select threads from both sides.
An important consideration relates to the various diameters involved in creating threads. You must consider three metrics: the primary (wide) thread, the secondary (narrow) thread, and the diameter of the pilot hole into which the threaded feature will enter.
If your design instructs the manufacturer to mill guide holes the same diameter as the main (wide) threads, the hardware you use will never fit properly in the holes. It will come out of nowhere and the screw may spin endlessly in the hole. At this point, your only option will be to use larger hardware, which may not be functionally acceptable or consistent with your design. Ensuring that the pilot hole for any threaded feature reflects the small diameter of the threads can save you some trouble.
External Threads
The advantage of turning external threads on a part is that the threads extend the length of the part as long as the part meets the turning conditions. Milling external threads is done in two stages. The first set of threads goes around one half of the turned part and then the threads are milled on the other side. The two sides intersect along the centerline of the part. This process is suitable for 1/2-inch threads, but we recommend dressing the threads to remove excess material or eliminate mismatches in the threads.
(The CAD model shows a milled view of the male threads with the resulting radius highlighted in yellow. This applies to milled parts only.)
Smaller male threads (such as #6-32) are more difficult to machine with a ball or flat head mill because the pitch is so tight that a larger radius is left at the root of the thread. You will need to use a thread cutting die to cut the threads in order to remove the remaining material. On many parts, there will be 0.008 to 0.016 inches (0.2032 to 0.4064 mm) of radius left.
On turned parts, external threads are greatly improved because the part rotates in the center and a sharp, single-lip threading tool produces high-quality threads. The design of external threads is similar to that of internal bores. Keep in mind that you must remove the threads so that our software can digitally view the outside diameter to determine the type of threading required.
Alternatives to Threading
For most metal parts, threading is a great way to achieve a strong bond between component elements. But sometimes that's not enough, especially for parts made from weaker materials like plastic and aluminum. This is where inserts come in handy. If you're working with plastic parts, for example, an important thing to remember is that their threads will inevitably wear out much faster than those on metal parts.
The solution? Consider incorporating special coil inserts into your plastic parts to ensure a longer part life. These sturdy little disks allow you to get strong threads even in weaker materials. Basically, you will design a hole in the desired location where the insert can be added to the part later. There is quite a bit of flexibility, as the coil inserts are available in both UNC and UNF threads, ranging from #2 to 1/2 inch and metric from M2 to M12.